
Getting Started
for Android
Getting Started
for Android
Using eSIM's can be a little un-nerving, particularly if it's your first one. We've provided the below guides to install the SIM, test it and say goodbye to payment anxiety.
Using eSIM's can be a little un-nerving, particularly if it's your first one. We've provided the below guides to install the SIM, test it and say goodbye to payment anxiety.
Install the eSIM
Install the eSIM
Scannable from a QR code to get you up and running in minutes
Scannable from a QR code to get you up and running in minutes
Test it
Test it
Giving things a quick go to make sure things are working
Giving things a quick go to make sure things are working
Connect when needed
Connect when needed
Knowing how to quickly use Unbounded when taking payments
Knowing how to quickly use Unbounded when taking payments
Install the eSIM
Install the eSIM
Install the eSIM
Step 1
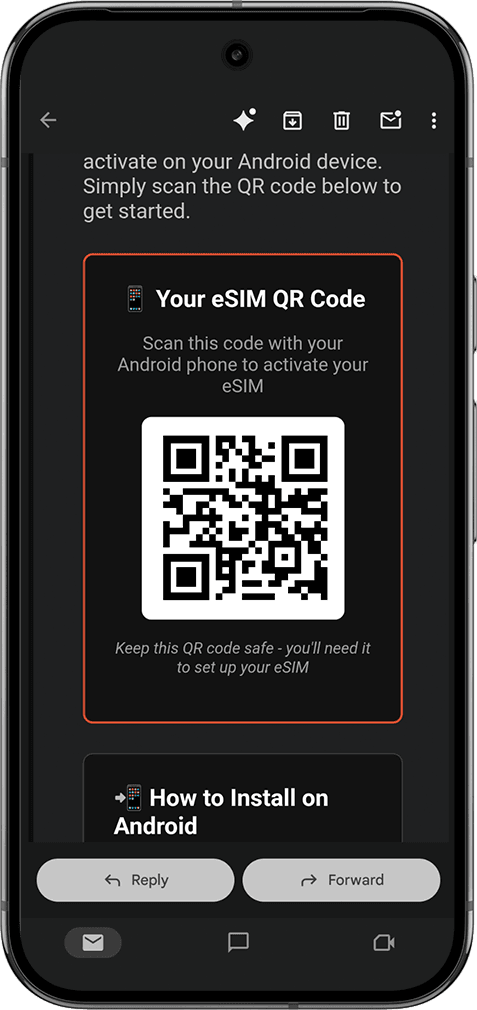
Use a different device (not your main phone) to open your email and scan the QR code using your phones camera.
Step 2
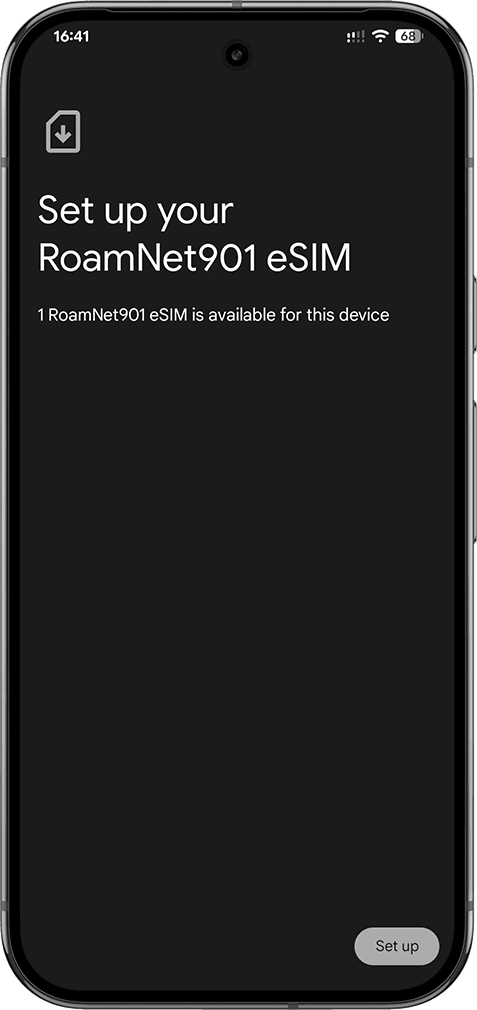
Tap Set up to Install the SIM.
Step 3

Once the Unbounded SIM is installed, you'l be prompted to go to your Settings.
Step 4

Once the SIM installs, it will show as RoamNet901. Turn the SIM on.
Step 5
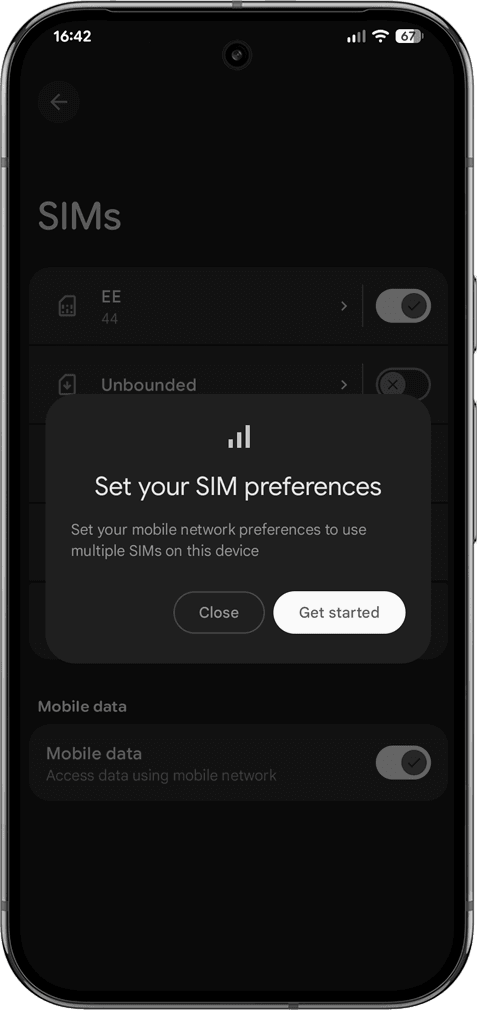
If you're asked to set your SIM preferences, tap 'Get Started'
Step 6

If you're asked to label your SIMs, tap on the Unbounded SIM.
Step 7
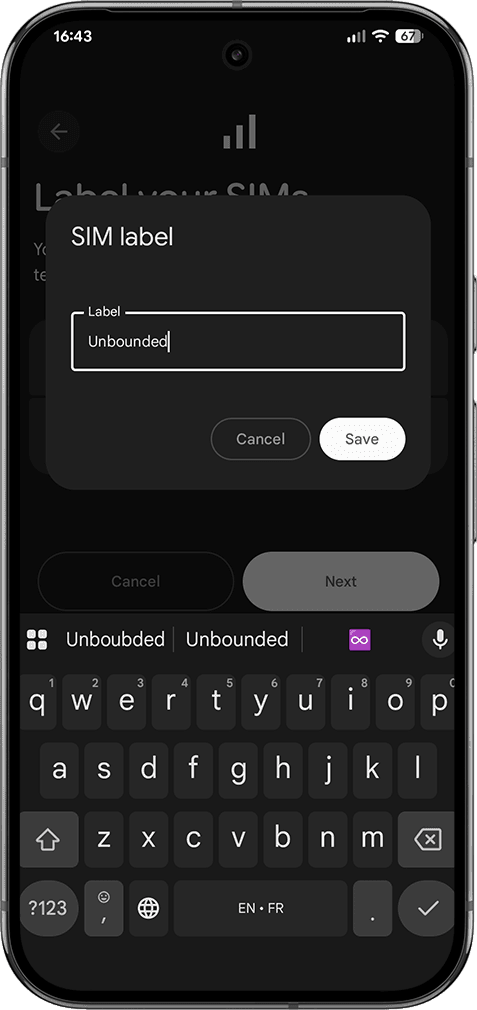
If you're asked to label your SIMs, tap on the Unbounded SIM.
Step 8
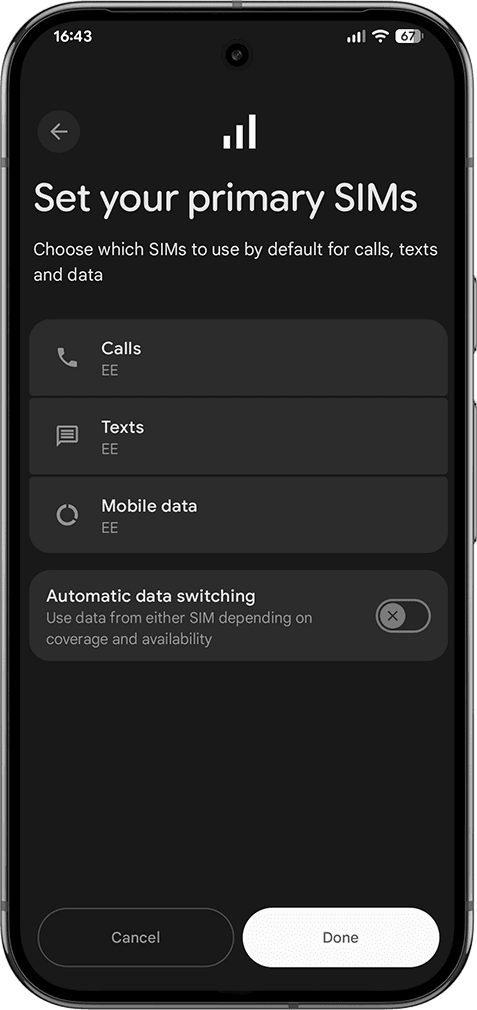
Your phone will ask which SIM you want to use for calls, texts and data. Select your normal original SIM.
Step 9
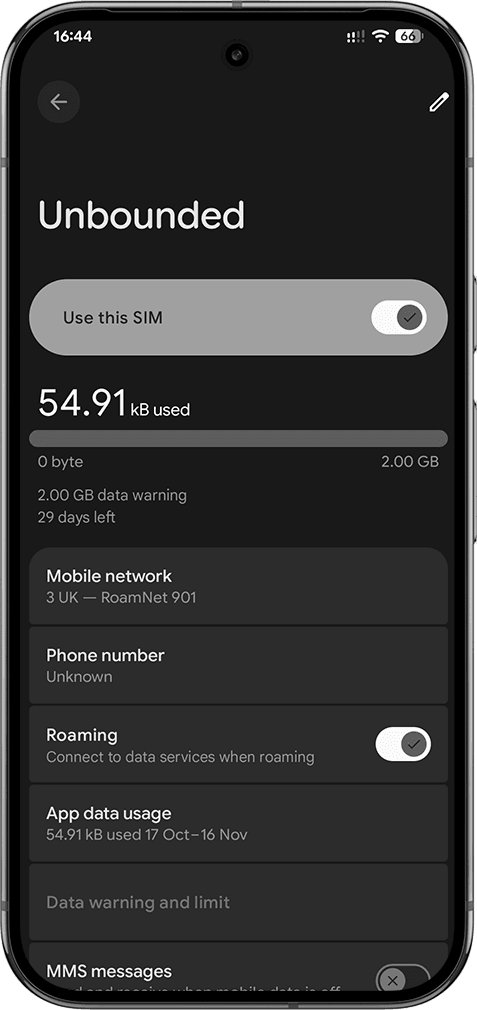
You'll then be taken to your Unbounded SIM. Turn on data roaming.
Step 10
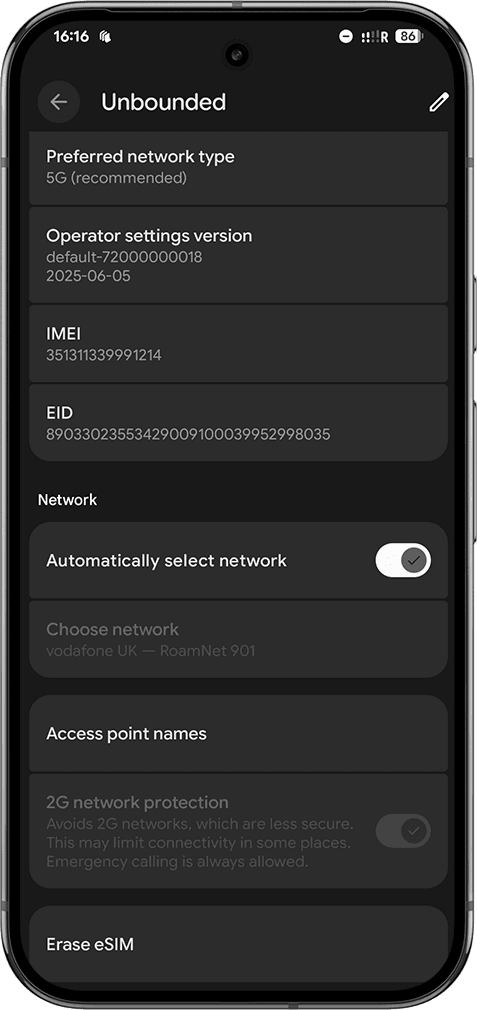
Scroll down to Access Point Names and tap on it.
Step 11

Tap on an APN to edit it, or create a new one using the +
Step 12
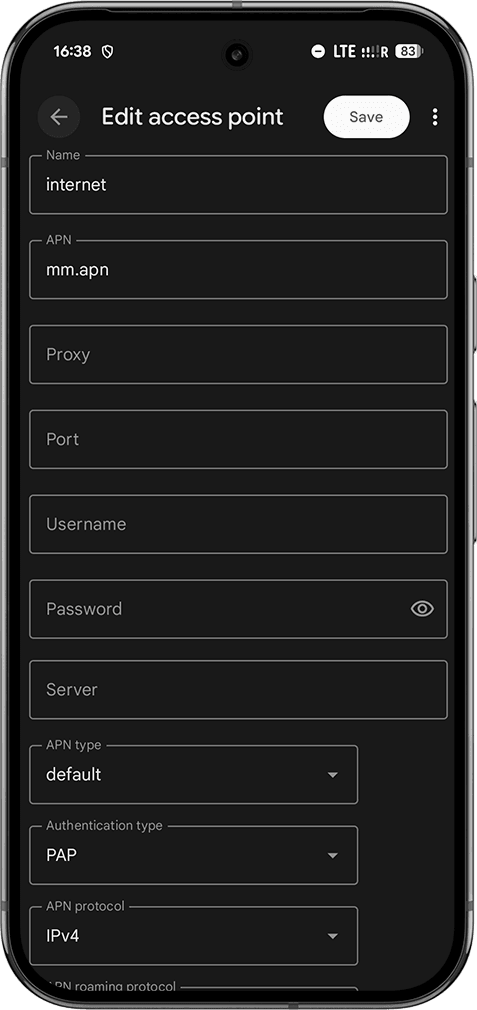
Set the name as internet, the apn as mm.apn and the authentication type as PAP. Tap Save.
Step 13

Go back to Settings, then Tap Network & Internet and ensure Private DNS is showing as Off. If it's not, tap on it and turn it off. And you're done!
Step 1
Use a different device (not your main phone) to open your email and scan the QR code using your phones camera.
Step 2
Tap Set up to Install the SIM.
Step 3
Once the Unbounded SIM is installed, you'l be prompted to go to your Settings.
Step 4
Once the SIM installs, it will show as RoamNet901. Turn the SIM on.
Step 5
If you're asked to set your SIM preferences, tap 'Get Started'
Step 6
If you're asked to label your SIMs, tap on the Unbounded SIM.
Step 7
If you're asked to label your SIMs, tap on the Unbounded SIM.
Step 8
Your phone will ask which SIM you want to use for calls, texts and data. Select your normal original SIM.
Step 9
You'll then be taken to your Unbounded SIM. Turn on data roaming.
Step 10
Scroll down to Access Point Names and tap on it.
Step 11
Tap on an APN to edit it, or create a new one using the +
Step 12
Set the name as internet, the apn as mm.apn and the authentication type as PAP. Tap Save.
Step 13
Go back to Settings, then Tap Network & Internet and ensure Private DNS is showing as Off. If it's not, tap on it and turn it off. And you're done!
Test it
Test it
Test it
Step 1
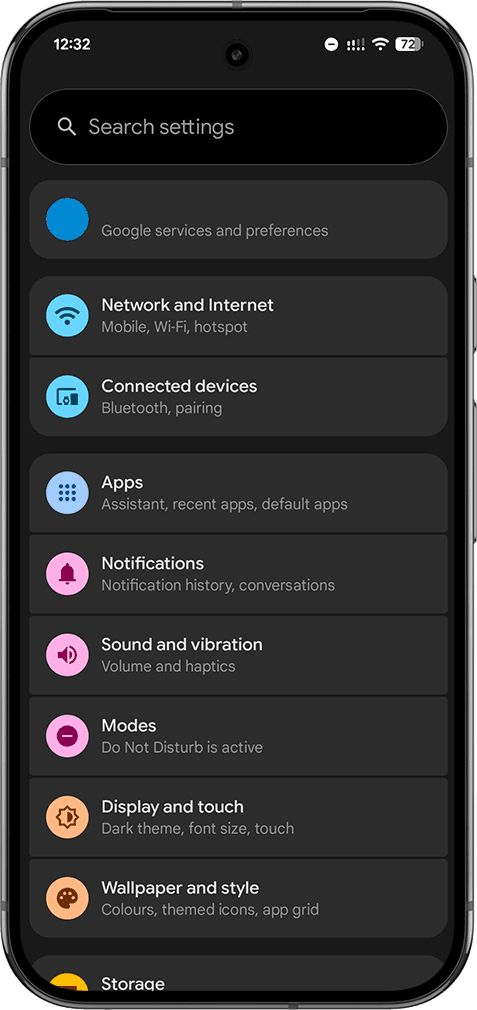
Tap on Network and Internet
Step 2
Tap on SIMs
Step 3
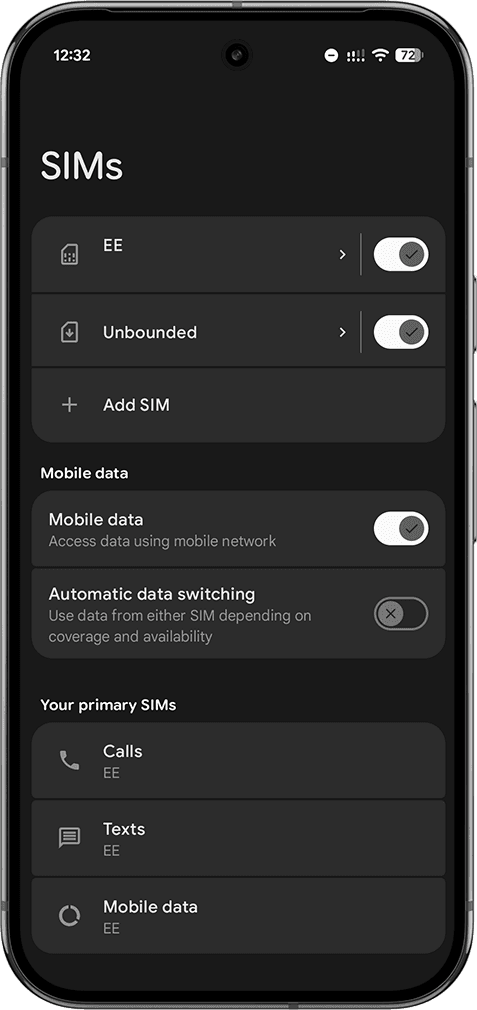
Tap on 'Mobile Data' in your primary SIMs. This will change the data source to Unbunded.
Step 4

Select Unbounded to move the data source to your eSIM.
Step 5

Go to www.test.go-unbounded.co.uk
If you get a green tick you're connected, a red X means you're using another data source (either WiFi or another SIM).If it doesn't connect at all, revisit the installation instructions
Connect when needed
Connect when needed
Connect when needed
Step 1
Tap on Network and Internet
Step 1
Tap on SIMs
Step 1
Tap on Mobile Data in 'Your primary SIMs'
Step 1
Tap on Unbounded when making payments, and then back to your normal SIM when needed.

Connect to more
Connect to more
© 2025 Go Unbounded Ltd